

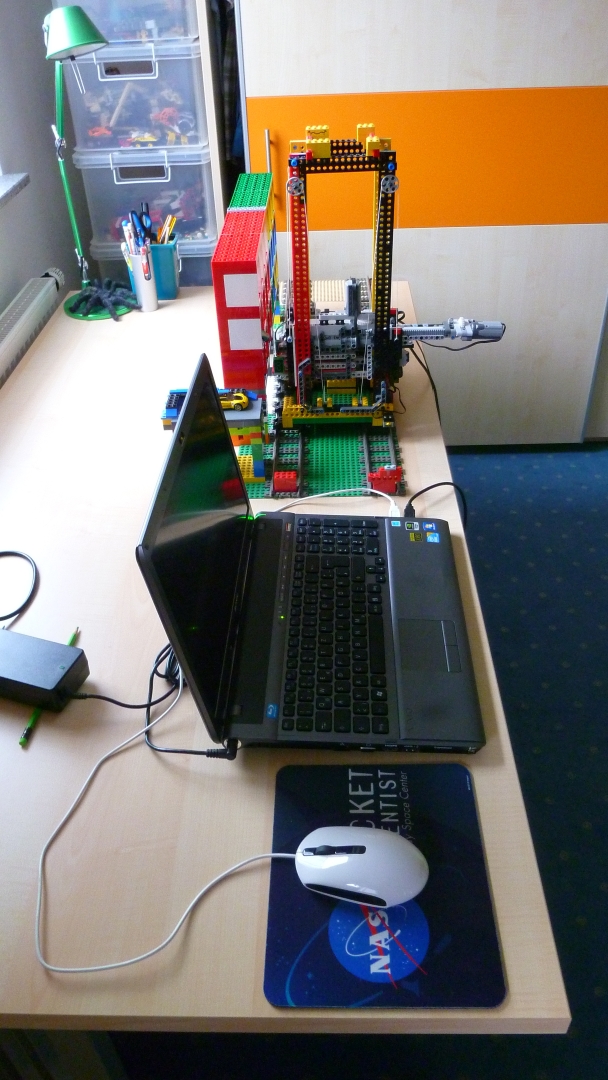
This is a warehouse for Hot Wheels cars. In real life such a robot could be used by car manufacturers, in really cool car dealerships or in automated under ground parking decks/parking garages.
Pictures
Video
Description of the Video
In the beginning of the video you can see the robot resetting: First the robot tries to move its arm in, but since it already is contracted, not much happens. Then the whole robot starts moving to reset its position.
The robot beeps after receiving the first command from the computer (it is connected via USB) and immediately starts moving to the “station”, which is one additional place next to the high rack in which the cars are stored. The station is supposed to be the part of the robot where cars can be inserted and removed.
You can see the whole robot move a little bit to the right and then back again. This is because it is resetting its horizontal position when moving to the station. Simultaneously the “box” moves up. The box is the part of the robot which can move up and down and which holds the cars while moving.
Then the arm reaches out and grabs the car from the station.
In the bottom-right corner the interface for controlling the robot is blended in. This is part of the computer program which is used to control the robot. It also has buttons to connect to and reset the robot, but they are not shown here. I programmed the robot and this program myself using the Java programming language and leJOS. The interface was recorded simultaneously using screen capturing software on my computer.
As you can see, you can click on any place and the robot will move to it. If the left mouse button was pressed, the robot will get a car from this place. If the right mouse button was pressed, the robot will put the car into the selected place and if the middle mouse button was pressed, the robot will just move there.
The car from the station is put into the first place available. Then a sequence of get and put commands is entered. The computer program will save the commands and wait for the robot to finish each command before sending the next one.
At last a simple move command is issued.
The camera angle changes now and you can see a close up of the robot resetting again. When the touch sensor (for lego experts: these are the old RCX touch sensors) hits the red bricks at the end of the track, the robot knows it has reached the station. Another touch sensor is used for resetting the box. It is connected to the yellow beams and the box will hit it if low enough. The robot then moves it up and lets it down again slower for accuracy.
Next is a side view close up of the grabbing mechanism. The inwards and outwards movement is controlled by the motor on the top and the movement of the “claw” is controlled by the motor on the right at the other end of the arm.
Details
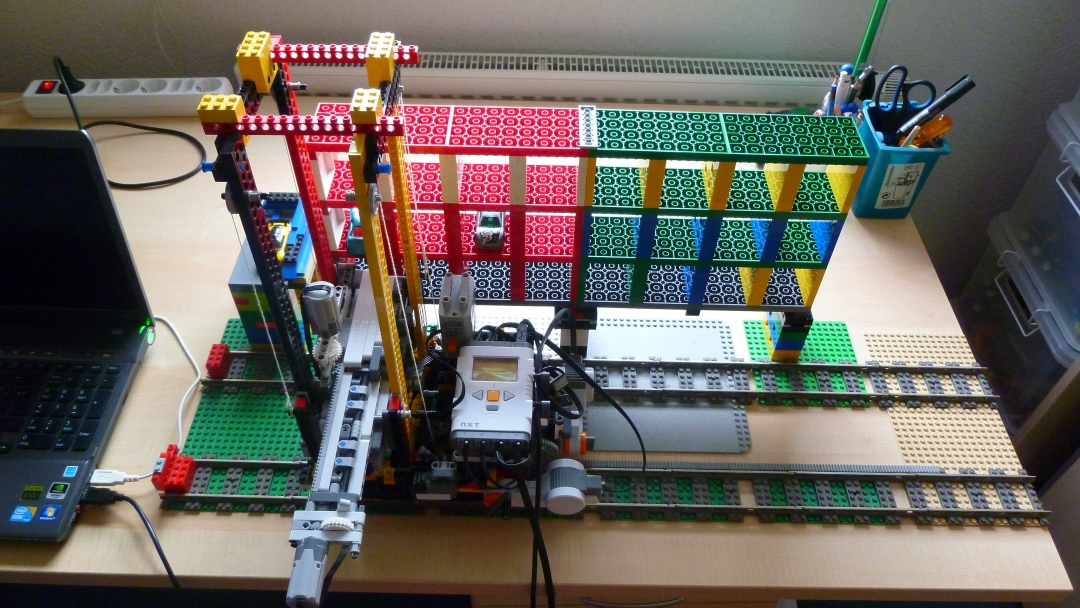
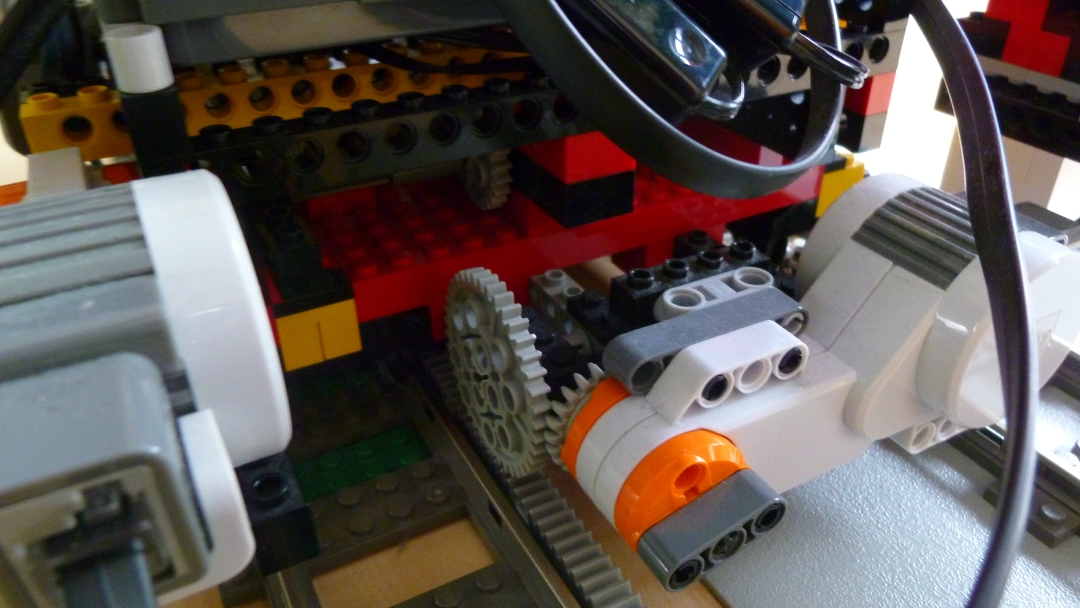
The ARM
It is powered by two medium power function motors. They are connected to a power functions receiver which is mounted at the back of the box and receives its power from a power functions battery box which sits on the base next to the NXT. The NXT controls these motors using a HiTechnic Infrared Link sensor which also sits on the base.
Since these motors can’t be controlled precisely, two 24 teeth gears with clutches are used (the white ones which let the axle slip when high torque is applied) and the motors are run a little bit longer than necessary to make sure the end point is reached.
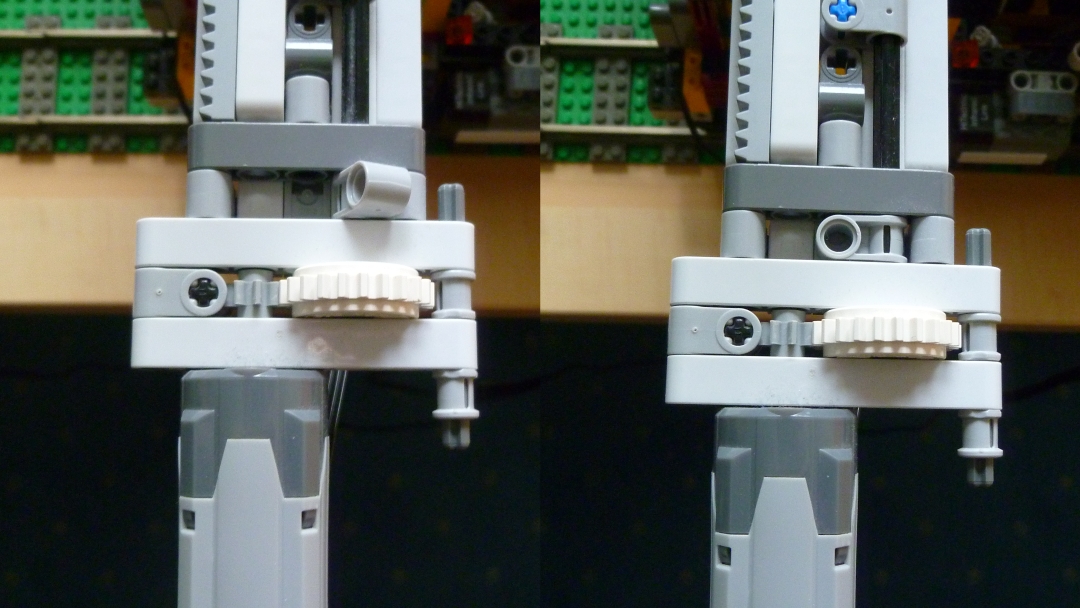
In this you can see the motor which controls the claw in the open and closed state. The little connector part sitting on the axle is what blocks the movement of this motor.
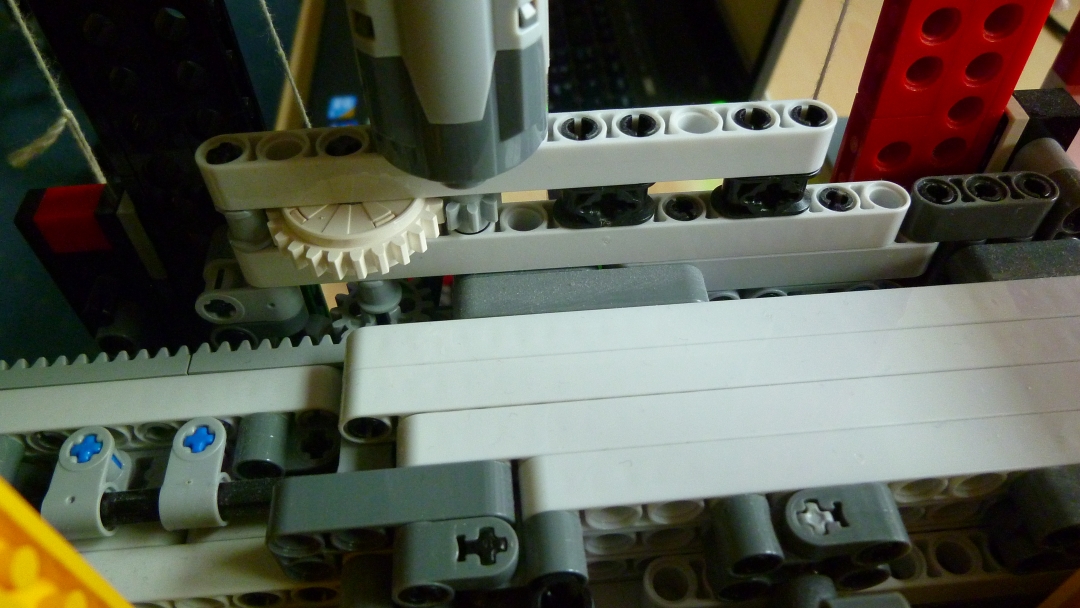
In this image you can see how the ohter motors controls the inwards and outwards motion of the arm.
The BASE
The base consists of some base plates mounted on train wheels and it runs on two parallel tracks. The first version of the robot used the train motors, but the robot was too heavy and the train motors where made for faster movement, so I had to switch to a different solution. Since I had to also precisely control the horizontal movement, I decided to use one of the NXT motors and racks.
The LIFT system
The strings that hold the box are the only non lego parts in this robot. I first used two NXT motors for the lift because I thought the box was pretty heavy, but in the final version there’s only one and that is enough. The lift system though is not very good I think. When going to the higher rows the box tilts slightly backwards. Also the strings change their length after some time (probably a month) and you have to re-measure the heights of the rows and re-enter them in your program, for the robot to access the rows with enough accuracy.
Also there is a winch for each of the 4 ropes. When the motor axle is disconnected, you can move each individually. You can also lock them with a simple blocking mechanism I build in. This makes it easy to bring them in sync. You can then attach the motor and the connecting axle to lock them together.
I would try to build a lighter version of the box and a totally different lift system for another robot of this kind.
More Information
The RESET mechanism
To reset the robot first the arm is pulled in. Then the robot simultaneously resets the base and the lift. The base slowly moves to the station until it hits the red bricks at the right end of the track with a touch sensor (the old RCX touch sensors are used). The base is also reseted every time the robot moves to the station. To reset the lift, the box is quickly moved down until it hits another touch sensor, then lifted up a bit and let down slower for accuracy. The robot is then ready to rumble :)
The STOP button
One NXT touch sensor is connected to the NXT via the longest cable I could find. If you press it the robot will stop whatever it is doing, so you can stop any program any time. I used it a lot, for example before the robot drives of the tracks and drops from my desk or tries to move while the arm is still extended, because the car blocked somehow. This was very helpful to prevent the robot from destroying itself and while testing my programs ;)